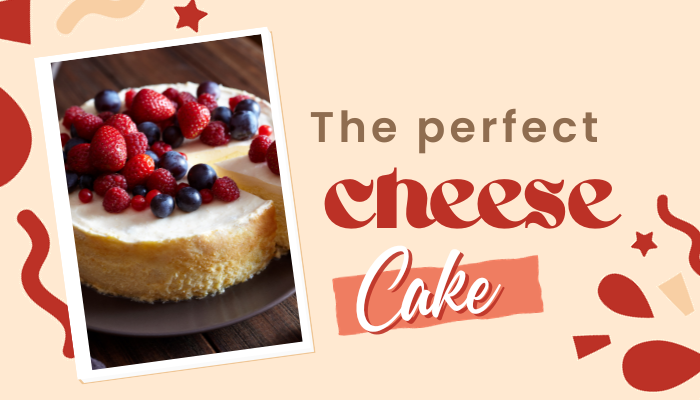
Perfect cheese cake:
How to make perfect Cheese cake must never be a source of anything except natural bliss. Not misery. Now, not frustration. Sincerely, by no means tears. Simply dreamy, decadent, nonstop bliss.
So let’s break down this entire manner into easy portions. Let’s talk about ingredients, water baths, and managing floor cracks—the complete shebang. Here’s a step-by-step recipe that will help you make a creamy, no-fail cheesecake that is everything you ever dreamed it may be.
3 hints for the best perfect cheese cake
Use a water tub. Baking the cheesecake in a water tub makes it more creamy.
Don’t overbake. You’ll realise it’s geared up while the outer ring is slightly puffed, but the inner circle jiggles like barely set Jell-o.
Permit it to cool slowly.
Allow the cheesecake to sit down in the turned-off oven with the door cracked for one hour, then remove it from the water bath and allow it to cool completely on the stovetop. Relax inside the fridge for a single day.
What are the important substances for a fantastic perfect cheese cake?
Cream cheese, in particular, complete-fat cream cheese. Cheesecake isn’t always the time to skimp.
Bitter cream: maximum cheesecake recipes use both heavy cream and sour cream; both will do the task of softening the feel of the cheese and adding a little moisture.
I select sour cream because I just like the greater hit of sour tang it provides to the cake.
Eggs: 3 whole eggs preserve the cheesecake collectively.
I also add a further yolk, which enhances the cake’s velvety texture. (Whites generally tend to lighten the cake; that’s really quality.) If you don’t mind keeping apart that fourth egg and don’t mind a little more airiness in the feel, simply upload the entire egg.)
The excellent type of cream perfect cheese to use
Let’s talk for a minute about the cream cheese—a very critical factor in cheesecake. A few humans have emblematic loyalty to Philadelphia, and I can’t deny that this cream cheese makes an especially silky and plush cheesecake.
I’ve also made cheesecakes with local brands and off-manufacturers and been flawlessly glad.
Starch adds coverage.
A little bit of cornflour or flour in the cheesecake batter provides coverage against cracking and makes the cake less complicated to reduce into smooth slices, even though it does alter the texture of the cheesecake.
Starch makes the cheesecake more firm and robust, even as a cheesecake that relies on eggs on its own has a softer, brilliantly creamy texture.
I have attempted each and love each. I sense like the feel distinction is virtually pretty slight—it might be noticeable in a side-by-side evaluation, but it’d take a true cheesecake gourmand to distinguish one.
on its very own. Move in whichever direction makes you happiest.
How do you make cheese cake creamy?
A water tub allows you to cook dinner the cheesecake oh so gently, while additionally creating a steamy environment so the surface doesn’t get too dry. It’s like a day spa for the cheesecake and makes it supremely easy and creamy.
A water bathtub is also not that tough.
Wrap the cheesecake pan in foil to prevent any water from seeping through the cracks of the pan.
Set the cheesecake in a roasting pan or other massive baking dish.
Fill it with a few inches of water, and place the entire contraption inside the oven.
Preventing cheese cake cracks
There are two primary reasons why your cheesecake might form cracks:
Overcooking and too-rapid cooling Both are entirely preventable
Prepare dinner for your cheesecake until the outer ring of the cake is barely puffed and pretty firm, but the internal circle nevertheless jiggles like barely set Jell-o.
A few toasty golden spots are best; however, if you see any small cracks forming, right away pass on to the cooling step.
While cooling, do it gradually. Permit the cheesecake to sit in the turned-off oven with the door cracked for about an hour, then remove it from the water bath and let it cool completely on the stovetop.
While you remove it from the water bath, also run a skinny-bladed knife around the edge to make sure the cake isn’t sticking to the pan, which can also cause cracks as the cake settles.
Continually (usually) relax with a cheese cake
A cheesecake is a make-ahead cake in the sense that you need to make it ahead. After all of the cautious baking and sluggish cooling, the cheesecake nonetheless wishes to sit back inside the refrigerator and end up being put in place for at least four hours, or (ideally) in a single day.
If you cut into the cheesecake before chilling, it will have a firm custardy texture, like flan, and you may suppose that you’ve accomplished something extraordinarily wrong.
But after chilling, it will have transformed into that velvety, creamy, lush cheesecake that we all realise and love. It’s like magic.
4 things you shouldn’t fear about
There are some moments in this method when you may think that everything is misplaced. I want to make your thoughts cosy.
Tiny bits of cream cheese within the batter: every now and then you get some little specks of cream cheese in the batter that didn’t depart—both due to the fact your cream cheese turned nonetheless a little chilly or due to the cream cheese itself (cream cheese with fewer additives tends to include much less without problems into the batter, exceedingly).
You don’t need large lumps, but those tiny speckles are great.
They will melt into the cheesecake as it bakes and won’t have an effect on the finished cake.
Some cracks: sure, occasionally you’ll get cracks on your cheesecake.
It occurs—usually in case you by chance cooked the cheesecake a bit too long or cooled it too quickly.
However, some cracks don’t mean you failed or that your cheesecake is ruined. Just coat it with topping and keep on.
A bit of water in the pan: Oh, no! Did a bit of water work its way through the foil and leak into your pan? Don’t fear it.
The out-of-doors fringe of your crust will appear a chunky before everything; however, it will be installed in the refrigerator overnight with none the wiser. Promise.
Wrong pan size: in case you best have a ten-inch pan and also need to make a recipe for a nine-inch cheesecake, it’s great to apply the pan you have got.
Converting the pan size while making cheesecake will affect the peak of the cheesecake and its cooking time (thinner cheesecakes will prepare dinner).
a bit extra quickly), but no longer its flavour or texture.
INGREDIENTS
For the perfect cheese cake:
Butter, for coating the pan
2 pounds of full-fat cream cheese
1 cup granulated sugar
1 tablespoon cornflour, or 2 tablespoons all-purpose flour (optional)
1/8 teaspoon salt
1/2 cup sour cream
2 teaspoons freshly squeezed lemon juice (optional)
1 teaspoon vanilla extract
3 large eggs
1 large egg yolk
Move Forth to Cheesecake Bliss
You’re now armed with the understanding you want to make the most satisfactory cheesecake ever. Use the recipe beneath, or simply observe those steps and techniques for your next cheesecake—either way, cheesecake bliss awaits. Once you’ve been given it down, right here are some cheesecake recipes to attempt:
Easy Instant Pot Cheesecake
Basque Cheesecake
No-Bake Cheesecake
Pumpkin Cheesecake
Tester’s note
Ideal and foolproof. That is a high reputation for a dessert fraught with the capacity for errors, but it certainly is. With clear and unique instructions, it became as though I had a chum holding my hand at each step.
I took Emma’s pointers: the usage of cornflour as coverage towards cracking and the inclusion of bitter cream for its tang to reduce through the
dense, richness of the cheesecake.
I baked my cake in a nine-inch springform pan, ensuring there was a good seal of aluminium foil before pouring in the water for the bath.
Sincere preparation on what to search for in batter texture and the wiggle-jiggle of the finished cake made breathing a bit less difficult.
The end result changed into a rich, creamy, and tangy cake without any signs of cracking.
I served this to pals welcoming a brand new child, and earlier than I left, a quarter of the cake turned into already long past.
In case you’ve never tried to bake a cheesecake or have attempted before and failed, tie on your apron and get baking with this recipe by means of your facet.
Instructions:
Warm the oven and melt the cream cheese. Arrange a rack inside the lower-centre function of the oven and heat the oven to 350°F.
Take the blocks of cream cheese out of their boxes and allow them to come to room temperature at the counter even as you put together the crust, approximately half an hour.
Coat the pan with butter. Use your hands to coat a small pat of butter all around the bottom and sides of a 9-inch or 10-inch springform pan.
Wrap the pan in foil. Cut two large portions of foil and place them on your work surface on top of each other in a pass.
Set the springform pan within the centre and fold the edges of the foil up and around the edges of the pan.
The foil gives you greater safety against water moving into the pan at some stage in the water bath step.
Prepare the crust. Overwhelm the graham crackers in a food processor (or in a bag with the use of a rolling pin) until they form fine crumbs—you ought to have one half to two cups.
Soften the butter in the microwave or on the stovetop and blend it into the Graham cracker crumbs.
The mixture needs to look like wet sand and keep together in a clump when you press it with your fist. If not, add more tablespoons of water (one at a time) until the aggregate holds together.
Switch it into the springform pan and use the bottom of a pitcher to press it flippantly into the bottom. (For step-by-step commands of this step, see How to Make a Graham Cracker Crust.)
Bake the crust. Place the crust in the oven (be cautious now not to tear the foil). Bake until the crust is fragrant and simply starting to brown around the edges, 8 to 10 minutes.
Permit the crust to cool on a cooling rack while you prepare the filling.
Mix the cream cheese, sugar, cornflour, and salt. Location the cream cheese, sugar, cornflour, and salt inside the bowl of a stand mixer outfitted with a paddle attachment. (As an alternative, use an electric-powered handheld mixer and big bowl.) blend at a medium-low pace until the aggregate
is creamy, like thick frosting, and no lumps of cream cheese continue to be
Scrape down the beater and the perimeters of the bowl with a spatula.
Blend inside the bitter cream, lemon juice, and vanilla.
Add the bitter cream, lemon juice, and vanilla and beat on medium-low velocity till combined and creamy.
Scrape down the beater and aspects of the bowl with a spatula.
Mix the eggs and yolks one at a time. With the mixer on medium-low velocity, beat the eggs and the yolks one by one.
Wait until the preceding egg is simply barely combined into the batter before including the following one.
At the beginning, the combination will look clumpy and broken; however, it’ll come together as the eggs are laboured in.
Stir a few times by hand. Scrape down the beater and aspects of the bowl with a spatula.
Stir the complete batter a few times by hand, being certain to scrape the bottom of the bowl, to make sure the whole lot is integrated.
The completed batter needs to be thick, creamy, and silky.
Do not worry in case you see a few specks of un-mixed cream cheese right here and there; they’ll melt into the batter all through baking and won’t have an effect on the completed cheesecake.
Pour the batter over the cooled crust. Take a look to make certain the crust and the sides of the pan are cool; if they are cool enough to touch without problems, you can pass on.
Pour the batter over the cooled crust and spread it into a fair layer.
Switch the pan to the water bath. Switch the pan to a roasting pan or a different baking dish large enough to maintain it.
Bring a few cups of water to a boil and pour the water into the roasting pan, being cautious not to splash any water onto the cheesecake.
Fill the pan to about an inch, or simply under the lowest fringe of foil.
Bake the cheesecake. Bake the cheesecake for fifty to sixty minutes.
Cakes baked in a 10-inch pan will generally prepare dinner in 50 to 55 minutes; desserts in a 9-inch pan will prepare dinner in 55 to 60 minutes. The cheesecake is finished while the outer to a few inches appearance is slightly puffed and set; however, the internal circle nevertheless jiggles (like Jell-O) when you gently shake the pan. Some spots of toasted golden shade are quality; however, if you see any cracks beginning to form, move directly to the next step right away.
Cool the cheesecake inside the oven. Depart the cheesecake from the oven.
Turn off the oven and crack the door open, or prop it open with a wooden spoon. Permit the cheesecake to cool slowly for 1 hour.
Run a knife around the edge of the cake and cool it completely.
Dispose of the cheesecake from the oven and from the water bathtub, unwrap the foil, and switch it to a cooling rack.
Run a skinny-bladed knife around the brink of the cake to make certain it is no longer sticking to the sides (which can cause cracks as it cools). Allow the cheesecake to cool completely on the rack.
Sit back the cheesecake for 4 hours inside the fridge.
Sit the cheesecake, exposed, for at least four hours or up to three days in the refrigerator.
This step is vital for letting the cheesecake set and achieving the ideal cheesecake texture; do not rush it.
Top the cheesecake and serve.
Take the cheesecake out of the refrigerator about 30 minutes before you intend to serve.
Unmold the cake and top the cheesecake simply before serving.
You can serve the cake right from the bottom of the springform pan or use a big off-set spatula to softly unstick the crust from the pan and transfer it to a serving platter.
FAQs:
Can I use low-fat cream cheese for cheesecake?
While low-fat cream cheese can be used, it may affect the richness of the cheesecake. Consider using a combination of low-fat and regular cream cheese for balance making it a perfect cheese cake.
What’s the difference between regular and whipped cream cheese in cheesecake?
Regular cream cheese has a denser texture, while whipped cream cheese is lighter. The choice depends on the desired texture of your cheesecake.
How can I prevent my cheesecake crust from becoming soggy?
Bake the crust before adding the filling to ensure it’s crisp. Additionally, consider brushing the crust with melted chocolate to create a barrier.
Is it necessary to use a water bath when baking cheesecake?
A water bath helps regulate the temperature and prevent cracks. While not mandatory, it’s recommended for a smoother, crack-free cheesecake.
Can I use a regular cake pan instead of a springform pan for cheesecake?
Yes, you can use a regular cake pan. Ensure it’s well-greased and lined with parchment paper for easy removal.
How do I prevent my cheesecake from cracking during cooling?
Gradual cooling at room temperature helps minimize stress on the cake. Avoid sudden temperature changes, as they can lead to cracks.
Can I add fresh fruits directly to the cheesecake batter?
Yes, you can. Ensure the fruits are diced or chopped, and fold them into the batter gently to avoid uneven distribution.
What’s the ideal thickness for a graham cracker crust in cheesecake?
Aim for a crust thickness of about 1/4 to 1/2 inch. Adjust based on personal preference, keeping in mind that a thicker crust may require longer baking.
How do I know when my cheesecake is done baking?
The center should be slightly jiggly, and the edges set. Use a toothpick; if it comes out with a few moist crumbs, the cheesecake is done.
Can I freeze cheesecake with toppings?
It’s best to freeze cheesecake without toppings. Add toppings after thawing to maintain their freshness and texture.
How can I fix a cracked cheesecake?
Cover the cracks with toppings or a dusting of powdered sugar. Alternatively, use a decorative sauce to camouflage imperfections.
What’s the difference between New York-style and classic cheesecake?
New York-style is denser and richer due to the addition of extra eggs and heavy cream. Classic cheesecake is creamier and lighter.
Can I substitute sour cream for cream cheese in cheesecake?
While not a direct substitute, you can use sour cream in conjunction with cream cheese to add tanginess and moisture.
How long can I store cheesecake in the refrigerator?
Ideally, consume within 4-5 days for the best freshness. Ensure it’s covered or stored in an airtight container.
Can I use a flavored crust for my cheesecake?
Absolutely! Experiment with different cookies or add spices to the crust to complement the overall flavor of your cheesecake.
What’s the key to a perfectly smooth cheesecake filling?
Use room temperature ingredients and beat the cream cheese thoroughly to avoid lumps.
Can I use a hand mixer instead of a stand mixer for the cheesecake batter?
Yes, a hand mixer works well. Ensure thorough mixing to achieve a smooth and uniform batter.
How can I make a vegan cheesecake?
Substitute cream cheese with vegan alternatives, use plant-based milk, and consider using soaked cashews for creaminess. Explore vegan crust options.
What’s the best way to serve cheesecake?
For clean slices, use a hot, dry knife and wipe it clean between cuts. Pair with fresh berries, a dollop of whipped cream, or a drizzle of chocolate.
Can I make mini cheesecakes using a muffin tin?
Yes, adapt the recipe for mini cheesecakes. Adjust the baking time, and consider using cupcake liners for easy removal.